

How To Edit A Template In Excel 2003
(Archives) Excel 2003/2004: Modifying Header and Footer Information
Last updated
This article is based on legacy software.
Excel allows y'all to customize your header (information printed at the elevation) and footer (information printed at the bottom) information to suit the needs for a given worksheet. This document describes some options for modifying your headers and footers. These options are located in the Page Setup dialog box; for more information on these options, refer to the Header/Footer Tab Options in Most the Page Setup Dialog Box.
Setting the Commencement Folio Number
This option allows y'all to set the number that you want to be printed on the first folio. The default volition start page numbering with ane; however, if you want to first numbering with a number other than one, follow these instructions.
-
From the File menu, select Page Setup...
The Page Setup dialog box appears.
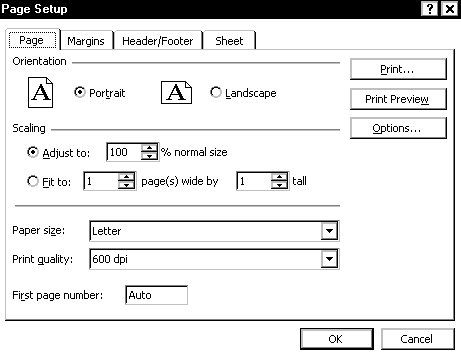
-
Select the Folio tab.
-
In the Showtime page number text box, blazon the number yous wish to brainstorm with.
-
Click OK.
Using Preset Headers and Footers
Preset headers and footers incorporate samples from Microsoft and headers or footers you accept used from other files in the by.
-
From the File menu, select Page Setup...
The Folio Setup dialog box appears. -
Select the Header/Footer tab.
-
From the Header or Footer pull-downward list, select a preset header or footer.
-
Click OK.
Working with Custom Header and Footer Buttons
There are several buttons available in the Header and Footer dialog boxes. Each one is displayed and explained here. To admission these dialog boxes, click Custom Header... or Custom Footer..., respectively.
| Button | Code | Action |
|---|---|---|
 | Displays the Font dialog box and then yous can adjust the font, size, and style of the text for each of the three sections of the header or footer. | |
 | &[Page] | Inserts the page number. |
 | &[Pages] | Inserts the full number of pages. |
 | &[Date] | Inserts the date. |
 | &[Time] | Inserts the time. |
 | &[File] | Inserts the filename of the workbook. |
 | &[Tab] | Inserts the name of the electric current worksheet. |
 | &[Path]&[File] | Inserts the path and filename. |
Windows:  Macintosh:  | &[Picture] | Displays the Insert Picture dialog box and so you can insert a picture. |
Windows:  Macintosh:  | Displays the Format Picture dialog box then y'all can adjust picture properties. |
NOTES: The Code cavalcade in the table higher up shows the command that Excel will insert when the pick is selected. The code will be translated to the corresponding information when the canvas is printed.
Creating Custom Headers and Footers
Sometimes, you may want to create your ain headers or footers. You lot tin adjust the font face and the size, add together your own text, and pick up fields of information from Excel. The Header dialog box for customizing appears here.

Adding a Custom Header or Footer
-
From the File card, select Folio Setup...
The Page Setup dialog box appears. -
Select the Header/Footer tab.
-
Click Custom Header ... or Custom Footer ...
The Header or Footer dialog box appears, respectively. -
Using the buttons described in Working with Custom Header and Footer Buttons, make full out the iii sections in the Header or Footer dialog box.
-
(Optional) To modify the font, refer to Changing the Header/Footer Font.
-
When done, click OK.
-
Click OK.
NOTES:
If you created a multiple line header, it may overlap with the data on the spreadsheet.
To ensure that your multiple line header is displaying properly, refer to Adjusting Margins with the Mouse or Adjusting Margins with the Page Setup Dialog Box.
Adjusting Margins with the Mouse
It may exist wise to cheque your custom header or footer to ensure that they will print properly. If there are issues with the display of your header or footer, you tin can set them by adjusting the margins.
-
From the File bill of fare, select Impress Preview .
The Print Preview dialog box appears. -
Review the custom header or footer.
-
If adjustments are necessary,
Windows: Click Margins.
Macintosh: Click Margins.
The margin outlines appear.

-
Using the mouse, click and drag the margin outlines.
NOTE: The uppermost and bottommost margins are for the header and footer, respectively. -
Click Close.
Adjusting Margins with the Page Setup Dialog Box
-
From the File carte, select Impress Preview .
The Print Preview dialog box appears. -
Review the custom header or footer.
-
If adjustments are necessary, click Setup...
The Page Setup dialog box appears.
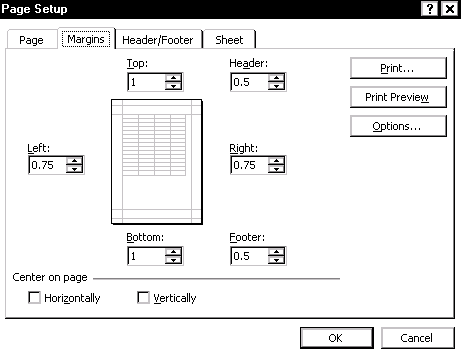
-
Select the Margins tab.
-
In the Height, Left, Right, Bottom, Header, and/or Footer text boxes, type or use the nudge buttons to adapt the margins.
-
Click OK.
-
Click Close.
Changing the Header/Footer Font
Yous can change the font of the header/footer text in the Header/Footer dialog box. For more information, refer to the department Calculation a Custom Header or Footer.
-
From the File card, select Folio Setup...
The Page Setup dialog box appears. -
From the Page Setup dialog box, select the Header/Footer tab.
-
Click Custom Header... or Custom Footer...
The Header or Footer dialog box appears, respectively.

-
Select the text in the section y'all want to change.
-
Click Font.

The Font dialog box appears. -
Under Font, Font style, and Size, make the appropriate changes.
-
Click OK.
Y'all are returned to the Header/Footer dialog box. -
Click OK.
Yous are returned to the Page Setup dialog box. -
Click OK.

How To Edit A Template In Excel 2003,
Source: https://www.uwec.edu/kb/article/excel-20032004-modifying-header-and-footer-information/
Posted by: johnsonalitels.blogspot.com
0 Response to "How To Edit A Template In Excel 2003"
Post a Comment