

How To Draw A Face For Kids

In this drawing guide, we will tell you lot how to draw a face for kids. This will be another simple drawing tutorial for artists who desire to be able to paint portraits but need more suitable guides. A simple cartoon way allows you to focus on the basics, such as correctly drawing the oval of the confront or applying strokes for drawing the eyes and lips.
Step 1
So we offset this guide on how to draw a face for kids. Showtime, draw a rough outline of the head. It looks like a vertically elongated oval with polish top and lesser edges. Place this oval in the center of a slice of paper if you are drawing a portrait. Don't try to draw a perfectly straight, symmetrical outline. Use lite lines that y'all can erase later on.

Step 2
This will be a rather short but very important pace. We will now do a little markup. First, draw two crossing lines. The vertical line divides the face contour in half. Place a horizontal line in the heart of the oval. Use 2 short vertical lines to marker where the outer and inner corners of the optics will be.
Then use the same curt strokes to marking the location of the nose and lips. Too, add the outline of the neck using two slightly beveled lines.

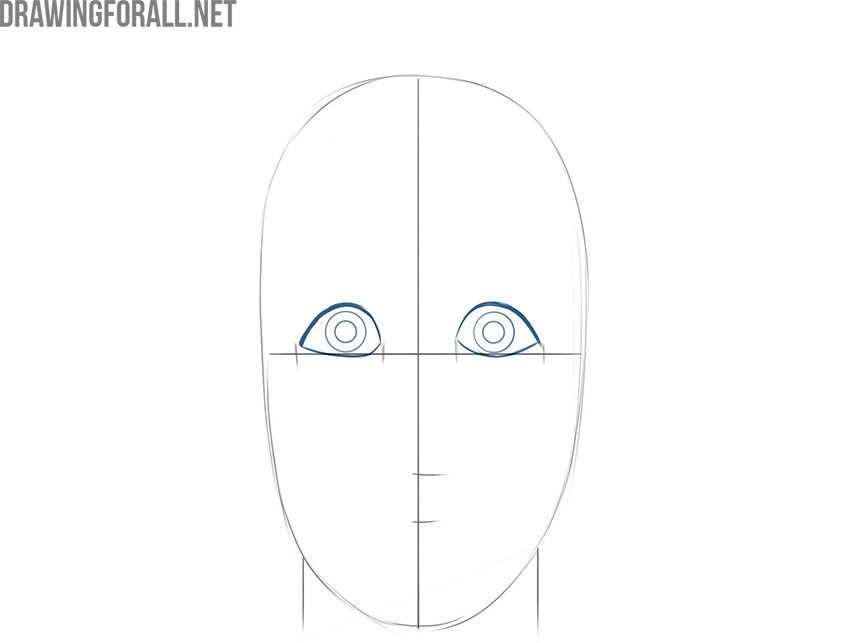
Step 3
This is a continuation of the guide about how to draw a face up for kids. Draw the eyes. The outer shape of the eyes resembles the shape of a leaf. Focus on the construction lines that we drew earlier. The position of the pupils affects the character and management of your character's gaze.
The educatee is formed from two circles of different diameters. Note that the pupils of this graphic symbol are slightly shifted towards the center. This creates the effect that the grapheme is looking directly at y'all.
Pace four
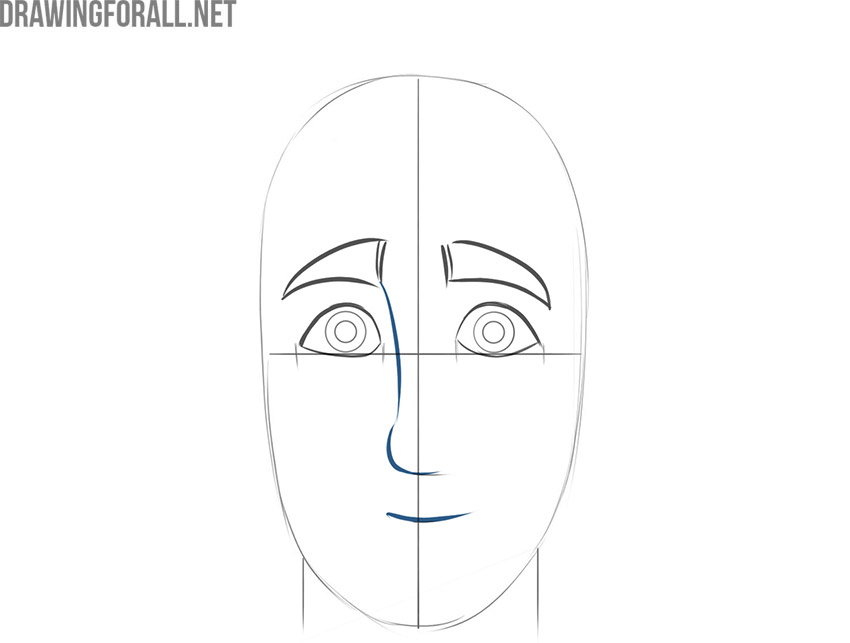
At present let'southward beginning drawing the eyebrows. You tin easily cope with this job if you imagine the eyebrows as two triangles formed past smooth, curved lines. Please note that the superlative of the eyebrows is virtually equal to the size of the palpebral fissure. Avoid detailing the eyebrows to maintain the cartoon mode.

Step v
Let'south start drawing other parts of our grapheme'due south face up. First, sketch out the nose with i shine, curved line. You may have noticed that this line starts from the bottom corner of the left eyebrow, then goes downward, curves slightly, and forms the outline of the tip of the nose. Then draw the mouth in one continuous arc.
Footstep 6
Draw the lower office of the face and ears. The final outline of the chin coincides with the bottom edge of the oval from the beginning of the drawing lesson. Add a slight extension to the face up at the corners of the lower jaw for a more realistic expect. Later that sketch out the ears in the form of 2 modest ovals. Use the optics and nose as fundamental reference points when drawing the ears.

Step 7
Draw the hair. You can come up upward with the contours of the hairstyle according to your imagination. In our case, the hair looks slightly tousled. Nosotros achieved this effect with pointed triangles at the bangs and crown. Avert over-detailing your character's hair. This will complicate the drawing and violate the cartoon style concept.

Step viii
Check that all the shapes and proportions of your character's face are correct. Delete any structure lines that we no longer need. Brand the final lines sharper and more contrasting. If y'all want to complicate the drawing, then add together some shadows.

Source: https://www.drawingforall.net/how-to-draw-a-face-for-kids/
Posted by: johnsonalitels.blogspot.com
0 Response to "How To Draw A Face For Kids"
Post a Comment